RV Maintenance Guide for Beginners: Save Thousands!
If you own an RV, you know it’s more than just a vehicle—it’s your home on wheels. Whether you’re a weekend camper or a full-time traveler, keeping your RV in top shape is essential for a smooth, stress-free journey. Regular maintenance not only extends the life of your RV but also helps prevent costly breakdowns and unexpected surprises on the road.
I’ve spent years maintaining my own RV, and I’ve learned firsthand what works and what doesn’t. In this guide, I’ll walk you through everything you need to know about keeping your RV running like new. From basic upkeep to in-depth inspections, this guide covers it all in a simple, practical way.
This guide will walk you through the must-know maintenance basics, easy-to-follow checklists, and tips to help you feel confident as a new RV owner. Let’s dive in!
1. Understanding RV Maintenance: Why It Matters
Regular maintenance keeps your RV running smoothly, prevents breakdowns, and ensures a comfortable travel experience. Think of your RV like a home on wheels—it needs care for both its vehicle components (engine, tires, battery) and living space (plumbing, appliances, safety systems).
What Happens If You Skip Maintenance?
- Unexpected breakdowns—A neglected RV can leave you stranded far from help.
- Expensive repairs—Small issues, like a leak, can turn into costly damages.
- Safety risks—Worn-out tires or faulty brakes can lead to accidents.
- Ruined trips—A broken fridge or clogged toilet can make travel stressful.
How Often Should You Perform Maintenance?
- Before every trip – Quick safety checks (tires, fluids, propane, lights).
- After every trip – Cleaning, inspecting for leaks, emptying tanks.
- Seasonally – Deep maintenance for winter storage or summer preparation.
- Annually – Professional inspections of major systems (engine, brakes, electrical).
Maintaining your RV doesn’t have to be complicated—just start with small, easy habits!
2. Beginner’s Essential RV Maintenance Toolkit
Before you begin any maintenance, having the right tools makes everything easier. Here’s a starter toolkit every RV owner should have:
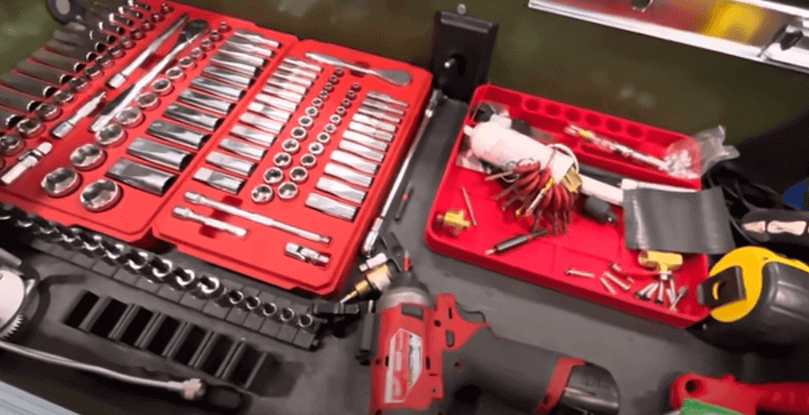
Basic Tools for Quick Fixes
- Adjustable wrench & screwdrivers – Useful for tightening loose parts.
- Flashlight or headlamp – Helps when checking under the RV or in dark spaces.
- Duct tape & electrical tape – Temporary fixes for minor issues.
- Tire pressure gauge – Essential for checking your tires before trips.
Maintenance & Cleaning Essentials
- RV-safe soap & brushes – Protects the exterior and roof from dirt buildup.
- Lubricant (WD-40 or silicone spray) – Keeps hinges, locks, and slides moving smoothly.
- Black tank treatment – Prevents odors and clogs in the toilet system.
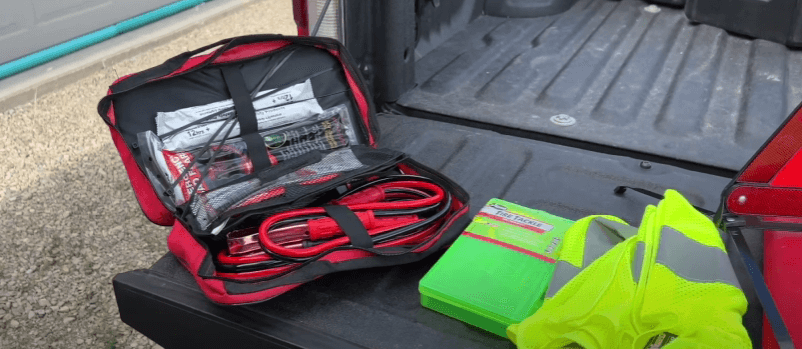
Safety & Emergency Gear
- Fire extinguisher – Check expiration dates regularly.
- Roadside emergency kit – Includes jumper cables, warning triangles, and a first aid kit.
- Owner’s manual – Your go-to guide for troubleshooting RV issues.
Having these essentials on hand will make it easier to handle basic maintenance and small repairs on your own.
Check Out a free list – RV Maintenance & Repairs Essential Product List.
3. RV Pre-Trip Inspection: What to Check Before Hitting the Road
Before every trip, a quick inspection can prevent breakdowns and keep you safe. Follow this simple pre-trip checklist before you hit the road.
Step 1: Check the Tires
- Inspect for cracks, bulges, or low tread—replace if worn out.
- Use a tire pressure gauge to check pressure—adjust to recommended levels.
- Tighten lug nuts to ensure wheels are secure.
Step 2: Check Fluid Levels & Battery
- Engine oil – Top up or change if needed.
- Coolant – Prevents overheating—check levels and refill if low.
- Brake fluid – Ensure proper braking performance.
- Battery charge – Clean terminals and check the charge with a voltmeter.
Step 3: Test Lights & Safety Features
- Headlights, brake lights, and turn signals—Ensure they all work.
- Smoke and carbon monoxide detectors—Test batteries and replace if needed.
- Fire extinguisher—Make sure it’s not expired and is easily accessible.
Step 4: Inspect Water & Propane Systems
- Turn on the water pump and check for leaks.
- Test faucets, toilet, and shower to ensure proper water flow.
- Check propane levels and inspect for leaks using soapy water—bubbles indicate leaks.
Step 5: Secure Everything for Travel
- Close and lock all cabinets and drawers.
- Retract awnings and slide-outs completely.
- Secure loose items inside the RV to prevent movement while driving.
By doing this 5-minute inspection, you’ll reduce the risk of unexpected issues and enjoy a worry-free road trip!
4. Basic Engine & Mechanical Maintenance (Even If You’re Not a Mechanic!)
Taking care of your RV’s engine might sound intimidating, but you don’t need to be a mechanic to handle the basics. Regular checks help prevent major breakdowns and keep your RV running smoothly.
Step 1: Change the Engine Oil (Like Changing a Car’s Oil)
- How often? Every 3,000–5,000 miles or as recommended in your RV manual.
- Why? Old oil can lead to engine damage and reduced fuel efficiency.
Beginner Tip: If you’re unsure, go to a mechanic, but always check the dipstick to see if the oil is dirty or low.
Step 2: Check and Replace Air & Fuel Filters
- Air Filter: Keeps dirt from entering the engine—check every 10,000 miles.
- Fuel Filter: Helps prevent clogging in the fuel system—replace per manufacturer guidelines.
Beginner Tip: A clogged filter can lower gas mileage and strain your engine.
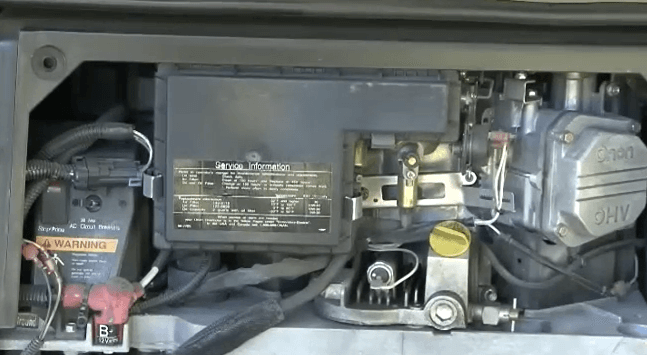
Step 3: Battery Maintenance (Avoid Getting Stranded!)
- Check battery terminals for corrosion—clean with baking soda and water.
- Test the charge with a voltmeter (should be 12.6V+ when fully charged).
Beginner Tip: If your RV sits unused for long periods, use a trickle charger to keep the battery from dying.
Step 4: Inspect Belts & Hoses
Look for cracks or wear in engine belts and hoses—replace if frayed.
Check radiator hoses for leaks—low coolant can lead to overheating.
Beginner Tip: If you hear squealing noises when you start the engine, a belt might be loose.
Step 5: Brake & Suspension Check
Listen for squeaking brakes—it may be time for new brake pads.
Tighten bolts on your RV’s suspension to prevent excessive movement.
Beginner Tip: Get a yearly brake inspection from a professional for safety.
Taking 10–15 minutes before each trip to check these simple engine components can save you from expensive repairs and keep you safe on the road.
5. Keeping Your RV Exterior Clean & Damage-Free
Your RV’s roof, windows, and walls are constantly exposed to sun, rain, and dirt. Regular cleaning helps prevent leaks, mold, and damage.

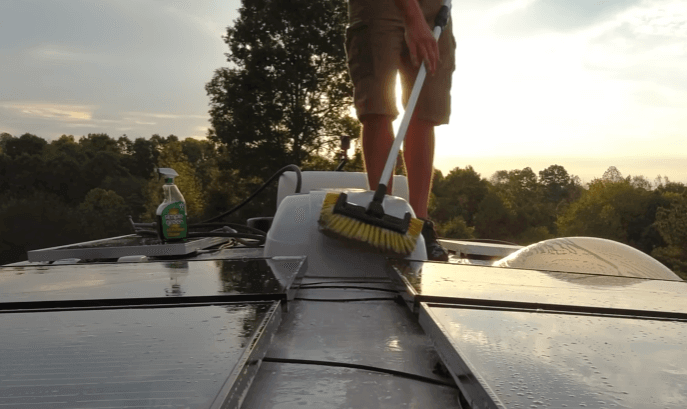
Step 1: Clean Your RV Roof (Most Beginners Forget This!)
- Why? A dirty roof can cause leaks, mold, and black streaks on the sides.
- How? Use a soft brush and RV-safe soap (avoid pressure washers).
Beginner Tip: Check roof seals and vents while cleaning to spot cracks early.
Step 2: Wash the Exterior & Remove Black Streaks
Use a long-handled brush and mild soap to clean the RV’s body.
Apply RV wax every few months to protect against sun damage.
Beginner Tip: Avoid regular dish soap—it strips protective coatings.
Step 3: Inspect & Maintain Window Seals and Doors
- Look for cracks in window seals—water leaks can cause serious interior damage.
- Lubricate door hinges to prevent squeaking.
Beginner Tip: Use silicone sealant to fix small cracks before they get worse.
Step 4: Care for the Awning & Slide-Outs
- Clean your awning with mild soap to prevent mold.
- Lubricate slide-out tracks so they open smoothly.
Beginner Tip: Never roll up a wet awning—it can grow mold quickly.
By keeping the exterior clean and well-maintained, your RV will last longer and stay in top shape for all your adventures.
6. RV Plumbing Maintenance: Keeping Water Flowing & Avoiding Costly Leaks
Few things can ruin an RV trip faster than a plumbing disaster—imagine turning on the faucet only to find no water pressure, a leaky pipe, or a backed-up toilet! But with a little preventative care, you can avoid the most common plumbing problems that leave beginners frustrated.

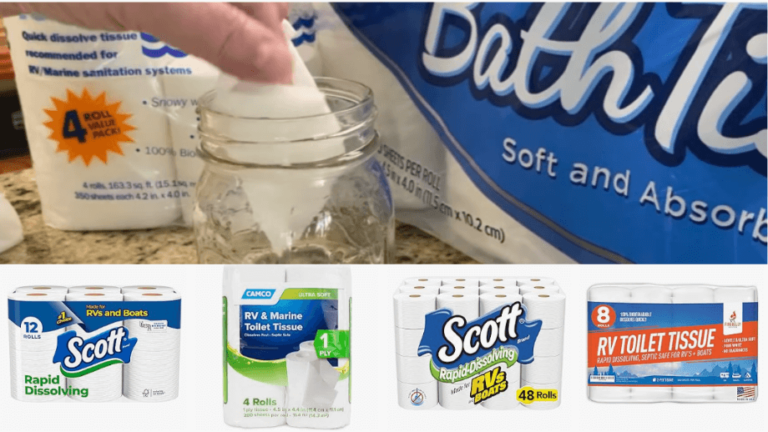
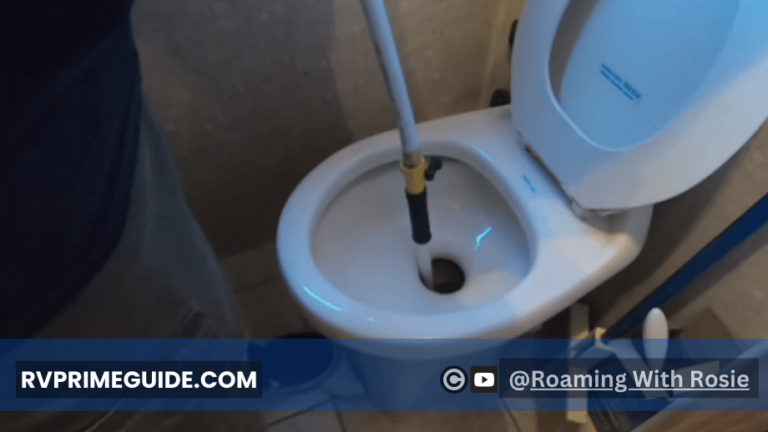
Step 1: Always Use RV-Safe Toilet Paper & Tank Treatments
- Why? Regular toilet paper clogs your black tank and creates nasty odors.
- Solution: Use RV-specific toilet paper and a good black tank treatment.
Expert Tip: Drop in a tank deodorizer after every dump to keep smells away.
Step 2: Check for Water Leaks Regularly
- Why? Small leaks turn into BIG water damage problems fast.
- How? Run water through sinks and showers, then check underneath for moisture.
Expert Tip: If your RV sits unused for a while, run the faucets weekly to keep seals from drying out.
Step 3: Keep Your Water Pump & Filters Clean
- Water pump sounds weak? It might be clogged.
- How to fix it: Clean out your water filter every few months and replace if necessary.
Expert Tip: If your pump runs even when no faucet is on, there might be a leak in your system—fix it ASAP!
Step 4: Winterize Your Plumbing Before Cold Weather
- Why? Frozen pipes can burst and cost hundreds to fix.
- How? Drain the water system and add RV antifreeze before winter storage.
Expert Tip: Even in mildly cold climates, a heated water hose can prevent damage.
With just a little effort, your RV plumbing will stay trouble-free—so you can focus on enjoying the road, not fixing leaks!
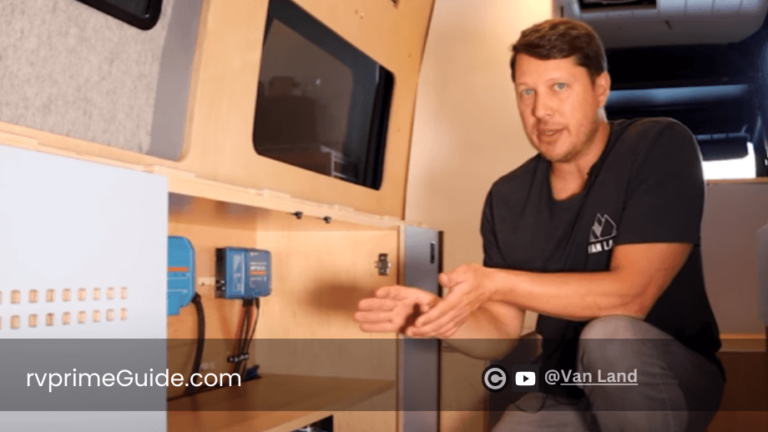
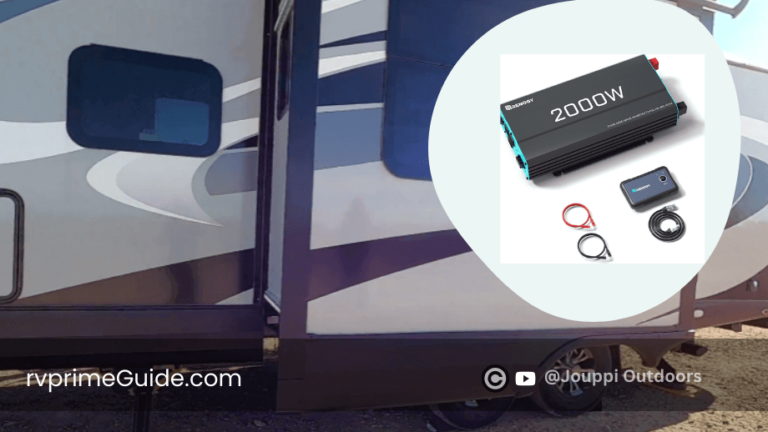
7. Electrical System Basics: Powering Your RV Without Headaches
Ever had your RV battery die at the worst possible moment? Or plugged into a campsite only to find your fridge isn’t cooling properly?
That’s why understanding your RV’s electrical system (even the basics) is a must for every beginner!
Step 1: Keep Your RV Batteries Charged & Maintained
- Why? A dead battery means no lights, no water pump, and no power for essentials.
- How? Check the battery charge regularly—should be 12.6V+ when full.
Expert Tip: If storing your RV for months, disconnect the battery to prevent slow drainage.
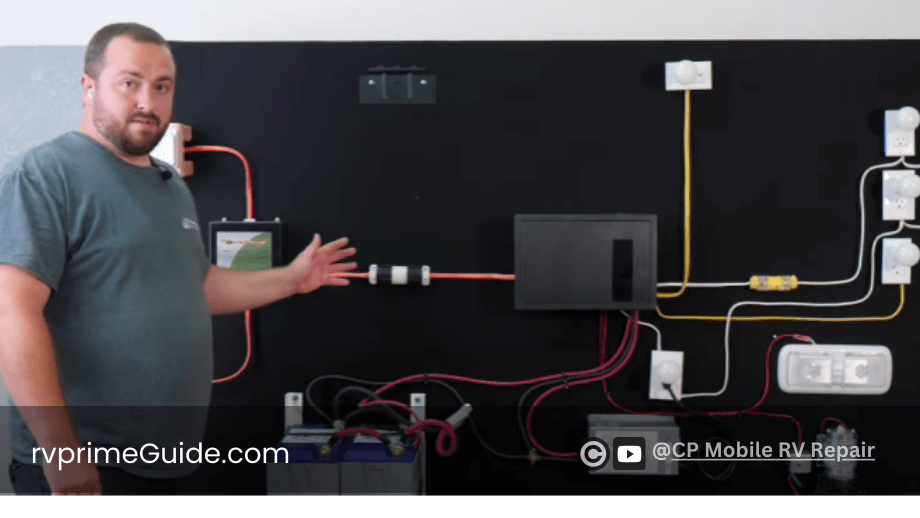
Step 2: Know the Difference Between Shore Power & Batteries
- When plugged into shore power (campsite), your outlets and big appliances run off that electricity.
- When unplugged, your RV runs on battery power—only certain things will work!
Expert Tip: Test your outlets before a trip by plugging in small devices—a loose connection can leave you powerless.
Step 3: Avoid Overloading Your Electrical System
- Why? Running too many appliances at once can trip your breaker.
- Solution: Know your amp limit—most RVs use 30A or 50A service.
Expert Tip: If using an extension cord, make sure it’s a heavy-duty one designed for RVs—cheap cords overheat fast!
Step 4: Check Your Generator & Solar Setup
- Run your generator every few weeks to keep it working smoothly.
- Solar panels? Make sure they’re clean and charging properly.
Expert Tip: A small portable generator is a great backup if you camp off-grid.
Mastering your RV’s electrical system helps prevent power failures, keeps your devices running, and ensures a smooth trip every time.
8. RV Appliance Maintenance: Keeping Everything Running Efficiently
One of the biggest perks of RV life is having home comforts on the road—a fridge to keep food fresh, an air conditioner for hot days, and a heater for chilly nights. But if you don’t maintain these appliances, they can break down when you need them most.
Step 1: Keep Your RV Refrigerator Cold & Running Efficiently
- Common Problem: RV fridges struggle to stay cold, especially in hot weather.
Quick Fix:
- Level your RV—many absorption fridges only work well when level.
- Don’t overpack—air needs to circulate for even cooling.
- Check the vents—blocked vents cause overheating and inefficiency.
Expert Tip: If your fridge isn’t cooling enough, try placing a battery-powered fan inside to improve airflow.
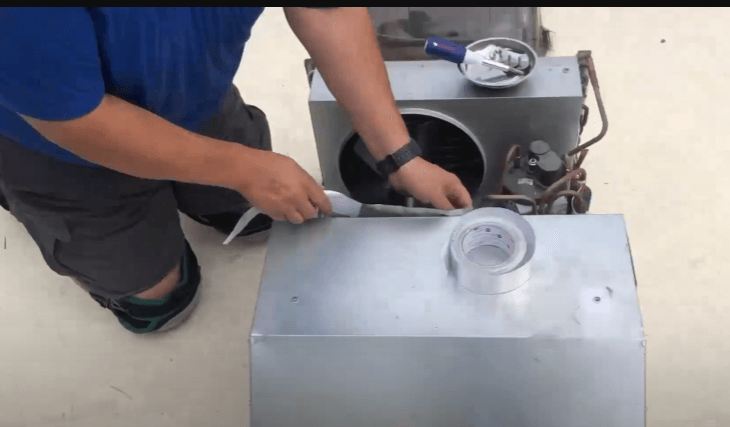
Step 2: Maintain Your Air Conditioner & Furnace
Furnace Issues:
- Clean dust and debris from furnace vents before using it.
- Check LP gas levels—a weak flame means you might be running low.
A/C Issues:
- Clean or replace air filters regularly.
- Check that roof vents are clear for proper airflow.
Expert Tip: If your A/C is running but not cooling well, clean the condenser coils—they can get clogged with dirt over time.
Step 3: Test Your Stove & Water Heater Before Every Trip
For the Stove:
- If burners won’t light, check for a loose gas connection.
- Clean burner holes with a toothbrush to remove dust buildup.
For the Water Heater:
- Drain and flush the tank every season to remove sediment buildup.
- If the heater isn’t working, check the pilot light (for gas models) or electrical connections (for electric models).
Expert Tip: If your water smells bad, it might be time to sanitize your water heater and fresh water system.
Taking 15 minutes to check these key appliances before a trip can save you hours of frustration on the road!
9. RV Tire Care & Safety: Avoiding Blowouts & Costly Repairs
Your RV’s tires literally carry the weight of your adventures. A single blowout can cause severe damage, or worse—a dangerous accident. Regular tire maintenance is one of the most critical safety tasks for any RV owner, especially beginners.
According to the NHTSA, tire failure causes over 11,000 RV accidents annually. Proper inflation can prevent most of these!
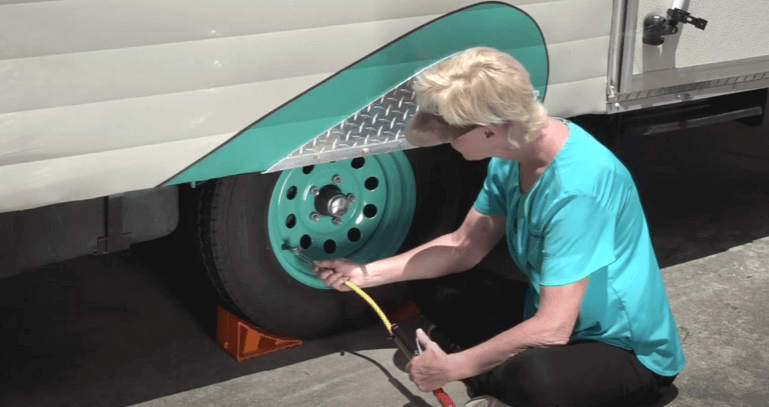
Step 1: Check Tire Pressure Before Every Trip
- Why? Underinflated tires heat up faster and are more likely to blow out.
- Recommended PSI: Find the correct pressure in your RV manual or on the sidewall of the tire.
Expert Tip: Use a digital tire pressure gauge for accurate readings and check when the tires are cold (before driving).
Step 2: Inspect Tires for Cracks, Bulges, & Uneven Wear
Visual Check:
- Look for cracks or dry rot on the sidewalls.
- Feel for bulges or soft spots—these could indicate internal damage.
- Check for uneven tread wear, which can signal alignment or suspension issues.
Expert Tip: Even if your tires look good, replace them every 5–7 years—old rubber becomes weak and dangerous.
Step 3: Rotate & Balance Tires for Even Wear
- Why? Front and rear tires wear differently—rotating them extends their lifespan.
- How often? Rotate every 6,000–8,000 miles for the best results.
Expert Tip: Have a professional check for proper wheel balancing—this helps prevent vibrations while driving.
Step 4: Never Overload Your RV
- Why? Overloaded RVs put too much stress on the tires, increasing the risk of a blowout.
Expert Tip: Weigh your RV at a truck stop scale to ensure you’re within safe weight limits.
Step 5: Carry a Spare & Know How to Change It
- Always have a spare tire in good condition—many RVs don’t come with one!
- Practice changing a tire at home so you’re prepared in case of a roadside emergency.
Expert Tip: Keep a portable air compressor and tire patch kit in your RV for quick fixes.
By staying on top of tire maintenance, you’ll drive with confidence and avoid costly, dangerous blowouts.
10. Preventative RV Maintenance: Catch Small Issues Before They Become Big Problems
One of the biggest mistakes new RV owners make is only fixing problems after something breaks. The secret to saving money and avoiding trip-ruining breakdowns is simple: preventative maintenance.
Step 1: Follow a Basic Monthly Maintenance Routine
Check These Every Month:
- Roof & Seals: Look for cracks, leaks, or water pooling.
- Tires & Brakes: Check pressure, tread wear, and lug nuts.
- Battery Health: Clean terminals and check voltage.
- Water System: Run faucets to check for leaks or clogs.
- LP Gas System: Smell for leaks or use a soapy water test on connections.
Expert Tip: A 5-minute roof check after every trip can save you thousands in leak damage repairs!
Step 2: Seasonal Maintenance Checklist
Before Summer Trips:
- Clean and test the A/C unit before the first heatwave.
- Sanitize the water system (especially if stored for winter).
- Inspect and repack wheel bearings if needed.
Before Winter Storage:
- Winterize plumbing with antifreeze.
- Remove and store RV batteries indoors.
- Cover tires and vents to prevent cracking and pests.
Expert Tip: Even if you use your RV year-round, a quick fall and spring inspection can prevent expensive surprises.
Step 3: Keep a Maintenance Log
- Why? Tracking maintenance helps with resale value and ensures you never miss an important check.
Expert Tip: Use a simple notebook or a free RV maintenance app to log dates and tasks.
Sticking to a simple preventative maintenance plan keeps your RV road-ready and stress-free!
11. RV Cleaning & Exterior Care: Protecting Your Investment
A clean RV isn’t just about looks—it prevents long-term damage and keeps your rig in great shape for years to come.
Step 1: Wash & Wax Your RV Regularly
- Why? Dirt, road grime, and UV rays cause fading, cracking, and early aging.
- How? Use RV-safe soap and a soft brush to avoid scratching the paint.
Expert Tip: Apply UV-protectant wax every 6 months to prevent sun damage.
Step 2: Clean & Reseal Roof Seams & Windows
- Why? Even tiny cracks lead to costly water damage over time.
- How? Use self-leveling RV sealant on any gaps in the roof or around windows.
Expert Tip: A quarter-sized crack in a seal can lead to a major roof leak—inspect and fix before it’s too late.
Step 3: Keep Your RV’s Undercarriage Rust-Free
- Why? Salt, moisture, and dirt can cause rust to eat away at the frame.
- How? Rinse the undercarriage after driving on wet or salty roads.
Expert Tip: Spraying a rust inhibitor on the frame once a year keeps it protected.
Step 4: Deep Clean the Interior for a Fresh-Smelling RV
Key Cleaning Areas:
- Floors & Carpets: Vacuum & mop after each trip.
- Kitchen & Bathroom: Prevent mold by keeping everything dry.
- Mattresses & Cushions: Air them out to avoid musty smells.
- Vents & Air Filters: Remove dust for better air quality.
Expert Tip: Placing charcoal bags or moisture absorbers inside your RV helps prevent mildew and keeps the air fresh!
Regular cleaning not only makes your RV more enjoyable but also protects your investment for years to come!
12. Electrical System Maintenance: Powering Your Adventures Without Fail
Your RV’s electrical system is the heart of everything—lights, appliances, water pumps, and even slide-outs depend on it. A dead battery or faulty wiring can turn a fun trip into a frustrating one. Here’s how to keep everything powered up and working smoothly.
Step 1: RV Battery Care & Maintenance
Common Problems:
- Battery won’t hold a charge
- Corrosion on battery terminals
- Draining power too quickly
How to Prevent Issues:
- Check battery voltage before every trip—12.6V+ means fully charged.
- Clean terminals with a baking soda solution to prevent corrosion.
- Disconnect the battery if storing your RV for more than a month.
Expert Tip: Deep-cycle RV batteries last 3-5 years—if yours struggles to hold a charge, it’s time for a replacement.
Step 2: Monitor & Maintain Your RV’s Electrical System
Key Safety Checks:
- Inspect power cords for cracks or burns.
- Test all outlets using a voltage meter.
- Ensure the surge protector is working—power spikes can fry appliances.
Expert Tip: Always use RV-specific extension cords—regular ones can overheat and cause fires.
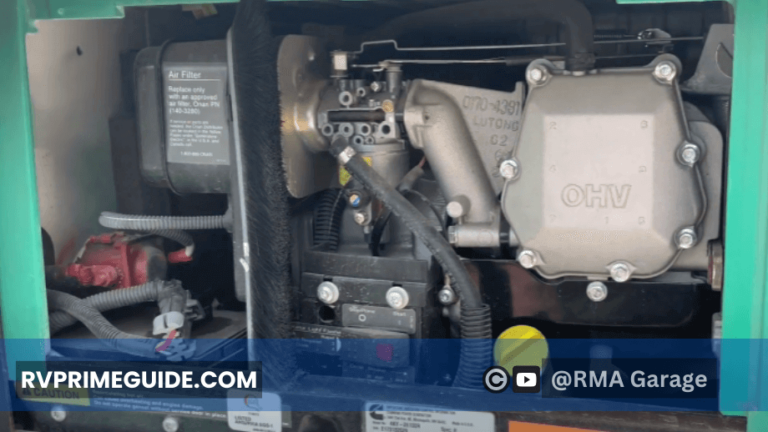
Step 3: Generator Maintenance for Reliable Backup Power
If you have a generator, it’s your lifeline when camping off-grid. But if it won’t start, your fridge, lights, and A/C are useless.
Generator Maintenance Tips:
- Run it at least once a month to keep fuel lines clean.
- Change the oil & filters based on the manufacturer’s schedule.
- Never overload it—check wattage limits before plugging in appliances.
Expert Tip: Use fuel stabilizer if storing the RV for winter—this prevents clogs in the generator’s carburetor.
A well-maintained electrical system means you never have to worry about power failures on your adventures!
13. Plumbing & Waste System Maintenance: Keeping Everything Flowing Smoothly
Your RV’s plumbing system makes life on the road comfortable—until something goes wrong! Clogs, bad odors, and leaks can ruin a trip fast. Here’s how to keep your water and waste systems in top shape.
Step 1: Fresh Water System Maintenance
Common Issues:
- Water tastes bad or smells funny
- Low water pressure
- Leaks under the sink
How to Fix & Prevent Problems:
- Sanitize your fresh water tank every 2-3 months.
- Use a water filter to prevent sediment buildup.
- Check for leaks under sinks and around fittings.
Expert Tip: Store your fresh water hose separately from your sewer hose to avoid contamination.
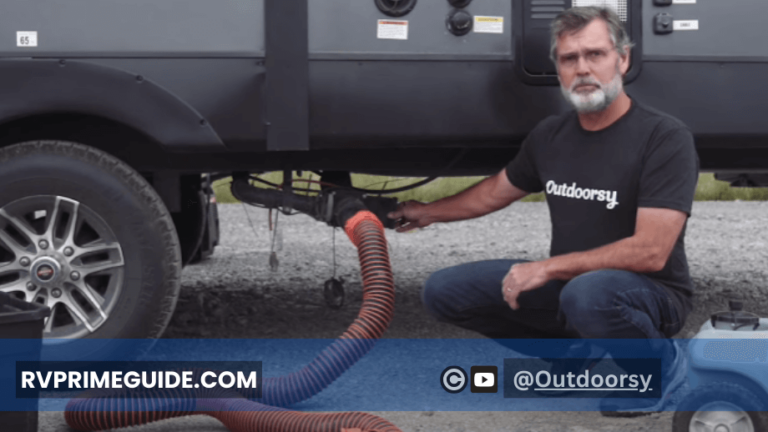
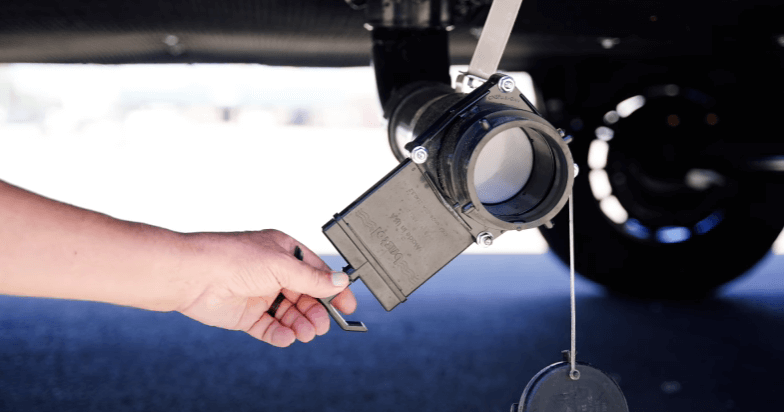
Step 2: Gray & Black Tank Maintenance (No One Wants a Clog!)
Common Problems:
- Bad odors coming from the toilet
- Slow draining sinks/shower
- Clogged black tank
How to Avoid a Messy Disaster:
- Use RV-safe toilet paper to prevent clogs.
- Flush the black tank with plenty of water every time.
- Add tank treatments to break down waste and control odors.
Expert Tip: Always dump your black tank first, then the gray tank—this helps flush out any lingering waste from the sewer hose.
Step 3: Winterizing Your RV’s Plumbing (To Avoid Frozen Pipes!)
If you store your RV in cold weather, you must winterize the plumbing, or risk expensive damage.
How to Winterize Your RV’s Water System:
- Drain all water tanks completely.
- Pump RV antifreeze through water lines.
- Open all faucets to release pressure.
Expert Tip: Forgetting to winterize can lead to burst pipes—a costly mistake that can easily be avoided!
Taking care of your RV’s plumbing and waste system means no nasty surprises on your trips.
14. HVAC System Care: Staying Comfortable in Any Weather
Your RV’s heating, ventilation, and air conditioning (HVAC) system ensures comfort whether you’re camping in the summer heat or winter cold. Regular maintenance prevents breakdowns and keeps energy costs down.
Step 1: Air Conditioner (A/C) Maintenance
Common Issues:
- A/C blows warm air
- Weak airflow
- Musty or moldy smell
How to Keep Your A/C Running Smoothly:
- Clean or replace air filters every 1-2 months.
- Check for debris in the A/C unit (leaves, dust, bugs).
- Tighten loose electrical connections to prevent power loss.
Expert Tip: If your A/C isn’t cooling well, check for low refrigerant levels—a common issue in older units.
Step 2: RV Furnace & Heater Care
Common Issues:
- Furnace won’t start
- Weak heat output
- Smell of gas or burning dust
How to Avoid Freezing on Cold Nights:
- Check propane levels before every trip.
- Clean vents & ducts to remove dust buildup.
- Test the thermostat to ensure it responds properly.
Expert Tip: Before the first cold night, run your heater for 10 minutes to burn off dust and avoid that burning smell inside your RV.
Step 3: Ventilation & Mold Prevention
- Why It Matters: Poor ventilation leads to mold, bad odors, and respiratory issues.
Easy Prevention Tips:
- Open vents and windows regularly to reduce moisture buildup.
- Use dehumidifiers or moisture absorbers in humid areas.
- Check bathroom fans to ensure they vent properly.
Expert Tip: If you notice condensation on windows or walls, it’s a sign of high humidity—increase airflow to prevent mold.
A well-maintained HVAC system ensures year-round comfort and better air quality inside your RV!
15. RV Safety Inspections: Keeping Your Rig Roadworthy & Secure
Regular safety checks prevent breakdowns and accidents, keeping you, your passengers, and your RV safe on every trip.
Step 1: Brake System Inspection
Common Problems:
- Brakes feel spongy or unresponsive
- Squeaking or grinding noises
- RV takes longer to stop
How to Stay Safe on the Road:
- Check brake pads & rotors for wear every 5,000 miles.
- Test brake lights before each trip.
- Inspect the trailer brake controller if towing.
Expert Tip: If your RV pulls to one side while braking, you may have uneven brake wear—get it checked ASAP.
Step 2: Tire Safety Checks
Common Issues:
- Underinflated tires (leading to blowouts)
- Uneven tread wear
- Cracked or dry-rotted sidewalls
Essential Tire Safety Steps:
- Check tire pressure before every trip (including the spare!).
- Rotate tires every 6,000–8,000 miles for even wear.
- Replace tires every 5-7 years, even if they look fine.
Expert Tip: Most RV blowouts happen due to low tire pressure. Investing in a Tire Pressure Monitoring System (TPMS) helps prevent this.
Step 3: Fire & Carbon Monoxide (CO) Safety
Why It’s Critical: RVs have propane appliances, electrical wiring, and limited escape routes, making fire safety a top priority.
Fire & CO Safety Checklist:
- Test smoke & CO detectors monthly.
- Keep a Class ABC fire extinguisher easily accessible.
- Check propane lines for leaks using a soapy water test.
Expert Tip: Store a fire blanket near the kitchen—it’s the fastest way to smother a small grease fire.
By staying proactive with safety inspections, you protect your RV and loved ones for stress-free adventures!
16. Exterior & Roof Maintenance: Protecting Your RV from the Elements
Your RV’s exterior and roof take the most beating—from sun, rain, wind, and debris. Regular maintenance prevents leaks, fading, and costly repairs down the road.

Step 1: RV Roof Care & Leak Prevention
Common Issues:
- Water leaks from roof seams
- Cracked or peeling sealant
- Dirt and debris buildup
How to Maintain Your RV Roof:
- Inspect the roof every 3 months for cracks or damage.
- Clean the roof with an RV-safe cleaner to prevent buildup.
- Reapply sealant around vents, seams, and skylights as needed.
Expert Tip: Most RV leaks start at the roof—a small crack in the sealant can lead to water damage inside. Catching issues early saves thousands in repairs.
Step 2: Sidewalls, Windows, and Doors
Common Problems:
- Faded or cracked exterior
- Window or door seals leaking
- Loose trim or side panels
How to Keep Your RV Looking Like New:
- Wash and wax your RV every 3-6 months to protect the finish.
- Check weather seals around windows and doors for cracks.
- Tighten or replace loose exterior trim before it detaches.
Expert Tip: Using UV-protectant spray on seals and rubber parts prevents drying and cracking.
Step 3: Awning Maintenance
How to Avoid a Sagging or Torn Awning:
- Keep it dry before storing—trapped moisture leads to mold.
- Lubricate awning arms for smooth operation.
- Check for rips or fraying—small tears can be patched before they grow.
Expert Tip: Wind damage is the #1 cause of awning failure. Always retract it in strong winds or when leaving your campsite.
Protecting your RV’s exterior and roof ensures long-lasting durability and prevents expensive water damage.
17. Storage & Off-Season Maintenance: Keeping Your RV in Peak Condition Year-Round
Proper storage is just as important as regular maintenance. Neglecting your RV during the off-season leads to dead batteries, mold, and costly repairs.
Step 1: Choosing the Right Storage Location
Common Storage Options:
- Outdoor storage: Cheaper but exposes RV to the elements
- Covered storage: Offers better protection from sun/rain
- Indoor storage: Best protection but most expensive
How to Protect Your RV in Storage:
- Use an RV cover if storing outdoors—this prevents sun and weather damage.
- Park on solid, level ground to avoid tire damage.
- Place rodent repellents inside to prevent infestations.
Expert Tip: Avoid parking under trees—falling branches and bird droppings can damage your RV’s roof and paint.
Step 2: Preparing Your RV for Long-Term Storage
Checklist Before Storing Your RV:
- Disconnect the battery and store it in a cool, dry place.
- Drain all water tanks to prevent mold and freezing.
- Turn off propane & unplug appliances for safety.
Expert Tip: Open cabinets and fridge to prevent musty odors from building up inside.
Step 3: Spring Prep – Getting Your RV Ready for the Road Again
Before Your First Trip:
- Inspect tires for cracks and proper inflation.
- Check for leaks in plumbing and roof seals.
- Reconnect and charge the battery before starting the engine.
Expert Tip: Run your generator for 30 minutes to clear out stale fuel and prevent startup issues.
Proper storage and seasonal prep keep your RV in top shape—so it’s ready to go whenever adventure calls!
Troubleshooting Common RV Issues: Quick Fixes for the Road
Even with great maintenance, unexpected problems can pop up during your travels. Knowing how to troubleshoot issues quickly can save you time, money, and stress.
Step 1: Power & Electrical Problems
Common Issues:
- RV outlets not working
- Battery drains too fast
- Flickering or dim lights
Quick Fixes:
- Check if the circuit breakers or fuses have tripped.
- Test shore power connection—a faulty pedestal may be the issue.
- If your battery drains fast, inspect for parasitic loads (appliances drawing power when off).
Expert Tip: Keep a multimeter in your RV toolbox—it helps diagnose electrical problems fast.
Step 2: Plumbing & Water System Troubles
Common Issues:
- Low water pressure
- Water pump running continuously
- Leaks under the sink or toilet
Quick Fixes:
- Check for kinks in water hoses or a clogged filter.
- If the pump won’t stop running, inspect for a leaky valve or air trapped in the system.
- Use plumber’s tape on pipe fittings to prevent small leaks.
Expert Tip: If your hot water smells like rotten eggs, the water heater’s anode rod may need replacing due to sulfur buildup.
Step 3: Slide-Out & Leveling System Malfunctions
Common Issues:
- Slide-out won’t extend/retract
- RV feels unstable when parked
- Jack system gets stuck
Quick Fixes:
- Ensure battery power is sufficient—low voltage can cause slide-outs to fail.
- Check for debris in slide-out tracks and lubricate them.
- If jacks are sticking, manually reset the leveling system.
Expert Tip: Always extend slide-outs on level ground—operating them on uneven terrain can damage the motor or frame.
Knowing these troubleshooting tricks can save you from a roadside disaster and keep your trip running smoothly.
Final Thoughts: Ensuring a Long Life for Your RV
Proper RV maintenance isn’t just about avoiding problems—it’s about ensuring safety, comfort, and peace of mind on every trip. By following the steps in this guide, you’ll be able to keep your RV in peak condition for years to come.
Key Takeaways for Keeping Your RV in Top Shape
- Stick to a maintenance schedule—prevention is cheaper than repairs.
- Always inspect before and after trips—catch small problems before they become big.
- Use checklists for maintenance, troubleshooting, and seasonal prep.
- Invest in quality tools & accessories—they save time and hassle.
Best Practices for Year-Round Care
- Monthly: Check fluid levels, tires, and batteries.
- Pre-Winter: Drain water tanks, disconnect the battery, and store properly.
- Spring Prep: Inspect for leaks, test all systems, and get road-ready.
Enjoying the Journey with a Well-Maintained RV
A well-maintained RV makes travel stress-free and more enjoyable. Whether you’re camping for a weekend or embarking on a cross-country trip, your RV is your home on wheels—taking care of it means more freedom, adventure, and unforgettable memories.
Now it’s time to hit the road!
FAQs: Your RV Maintenance Questions Answered
How often should I check my RV’s roof?
At least every 3 months—catching small cracks early prevents costly leaks.
What’s the best way to extend my RV battery life?
Keep it charged above 50%, clean terminals regularly, and store it properly when not in use.
Do I really need to rotate my RV tires?
Yes! Rotating them every 6,000-8,000 miles ensures even wear and prevents blowouts.
How can I prevent mold and odors in my RV?
Ventilate your RV regularly, use moisture absorbers, and keep the fridge/cabinets slightly open when in storage.
What’s the #1 mistake new RV owners make?
Skipping maintenance checks! A simple pre-trip inspection prevents major headaches on the road.
That wraps up your Ultimate RV Maintenance Guide for Beginners!
Want more RV tips? Bookmark this guide, share it with fellow RVers, and start your maintenance routine today!