How to Remove an RV Battery: Safely and Efficiently
Have you ever wondered how to remove an RV battery safely and efficiently? Whether you’re prepping your RV for off-season storage or replacing a worn-out battery, knowing the proper steps can save you time and prevent costly mistakes.
After years of RVing, I’ve learned the importance of handling batteries with care (yes, I’ve made a few mistakes!). In this guide, I’ll walk you through a foolproof process, sharing practical tips and safety precautions so you can remove your RV battery like a pro. Let’s dive in!
1. Why You Need to Remove an RV Battery
Removing your RV battery can help:
- Protect It During Storage: Cold temperatures can drain your battery and lead to damage. Learn why is my rv battery draining.
- Conduct Maintenance or Repairs: Access the battery for cleaning, testing, or repairs.
- Upgrade or Replace: Swap out an aging battery for a new one.
If left connected improperly, a battery can sustain damage or even pose safety hazards. For expert insights, check out RV battery maintenance guide.
2. Tools and Safety Preparations
Tools You’ll Need:
- Wrenches (adjustable or appropriately sized)
- Insulated gloves
- Safety glasses
- Battery terminal puller (optional)
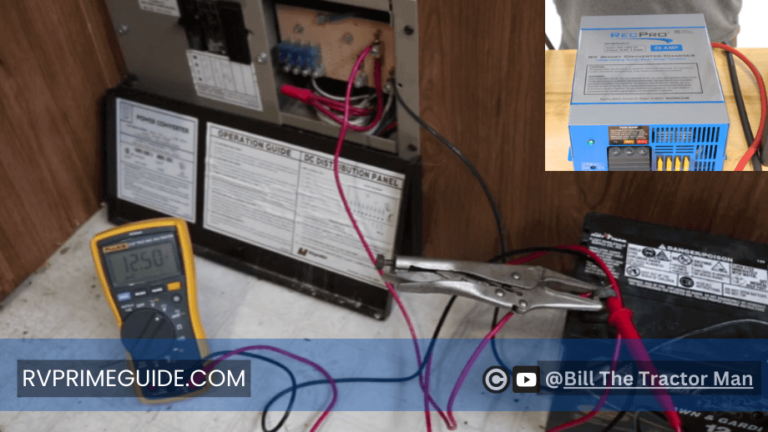
- Multimeter (for testing voltage)
Safety Checklist:
- Ensure the RV is parked on level ground.
- Turn off all appliances and disconnect shore power or generators.
- Wear gloves and safety glasses to protect against acid or electrical sparks.
- Have a stable surface ready to place the battery.
3. Step-by-Step Guide: How to Remove an RV Battery
Step 1: Disconnect All Power Sources
- Unplug the RV from shore power and turn off generators to eliminate electrical flow.
Step 2: Turn Off Appliances and Main Power Switch
- Make sure all internal systems are off to prevent accidental current.
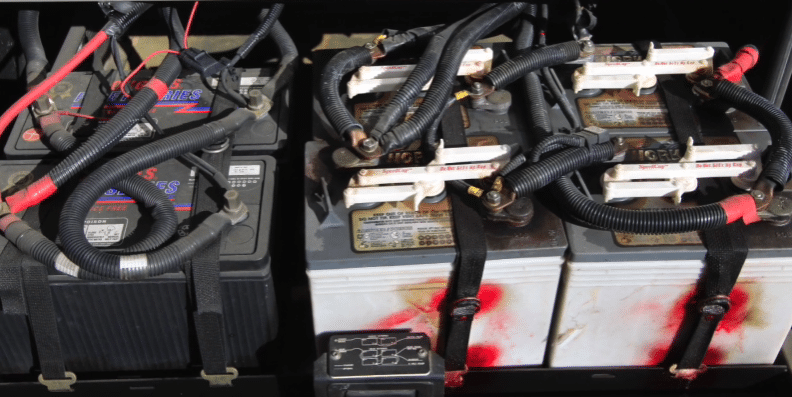
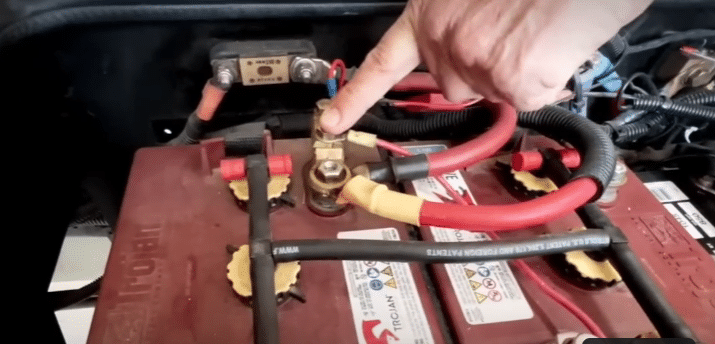
Step 3: Identify Positive and Negative Terminals
- Locate the terminals: positive (+) is typically red, and negative (-) is usually black.
Step 4: Remove the Negative Cable First
- Using a wrench, loosen the nut on the negative terminal and remove the cable. This step reduces the risk of sparks.
Step 5: Remove the Positive Cable
- Loosen the positive terminal nut and carefully detach the cable.
Caution: Do not let the positive and negative cables touch, as this could create a short circuit.
Step 6: Detach and Lift the Battery Carefully
- Unfasten any straps or hold-downs securing the battery.
- Lift the battery using proper form to avoid strain or injuries. RV batteries can be heavy; seek help if needed.
4. Cautions and Safety Tips
- Prevent Short Circuits: Always disconnect the negative cable first and reconnect it last.
- Wear Protective Gear: Acid exposure or sparks can cause injuries.
- Handle With Care: Batteries are heavy and can spill acid if tipped.
For more safety tips, visit RV Battery Safety Guide.
5. Proper Battery Storage After Removal
Once removed, store your battery correctly to ensure it’s ready for the next season:
- Clean the Battery: Wipe down terminals and the battery case with a solution of baking soda and water.
- Choose a Cool, Dry Location: Avoid areas with temperature extremes or high humidity.
- Maintain a Charge: Use a trickle charger or battery maintainer to keep the charge level stable.
| Storage Duration | Recommended Charge Frequency |
|---|---|
| Less than 3 months | Charge before reinstalling |
| 3-6 months | Recharge every 2 months |
| Over 6 months | Check voltage monthly |
6. When to Replace or Upgrade Your RV Battery
Consider replacing your RV battery if:
- It struggles to hold a charge despite regular maintenance.
- You notice physical damage such as cracks or bulging.
- Performance drops, leading to dim lights or reduced appliance efficiency.
Upgrading to modern lithium-ion or AGM batteries can provide better efficiency, less maintenance, and longer lifespan.
For more on AGM battery types, visit RV Battery Comparison.
FAQs
1. Can I remove the RV battery without disconnecting shore power? No. Disconnecting shore power ensures safety and prevents electrical shocks or sparks.
2. Why should I disconnect the negative terminal first? Disconnecting the negative terminal reduces the risk of sparks and accidental short circuits during the removal process.
3. How do I safely store my RV battery during winter? Clean the battery, fully charge it, and store it in a cool, dry place. Use a maintainer to keep the battery charged.
4. How can I tell if my battery is too heavy to lift alone? If the battery feels unwieldy or exceeds your lifting capability (usually 40-60 pounds), ask for assistance.
5. What’s the best way to dispose of an old RV battery? Recycle your old battery at a local auto parts store or recycling center to comply with environmental regulations.
Conclusion
Follow these steps, and you’ll have your RV battery removed safely and efficiently. With proper care, your battery will last longer and be ready for your next adventure!