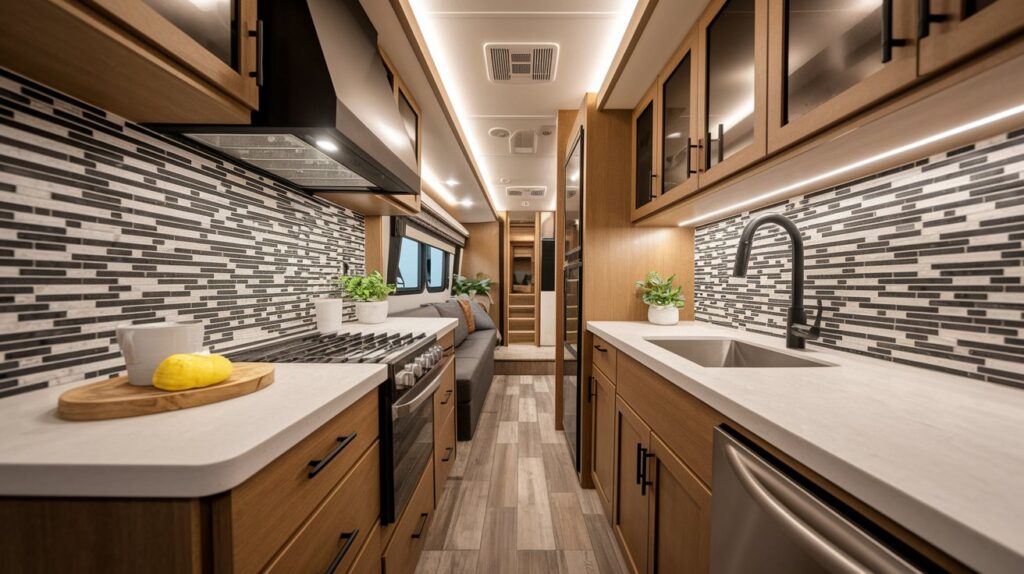
5 Steps to Install Peel and Stick Tiles in Your RV Easily
Peel and stick tiles are an easy and affordable way to upgrade your RV. They work great for kitchens, bathrooms, and living areas. These tiles are lightweight, stylish, and simple to install.
But here’s the catch: If you don’t install them correctly, they might peel off. Proper surface prep and technique are key to a long-lasting finish.
This guide will show you step-by-step how to install peel and stick tiles in your RV the right way. Follow these steps for a flawless, durable upgrade!
Why Choose Peel and Stick Tiles for Your RV?
Peel and stick tiles are a top choice for RV owners. Here’s why:
✅ Budget-Friendly – Much cheaper than traditional tiles.
✅ Lightweight – Helps reduce RV weight for better fuel efficiency.
✅ Easy Installation – No grout, mortar, or special tools needed.
✅ Low Maintenance – Stain-resistant and easy to clean.
✅ Water-Resistant Options – Great for kitchens and bathrooms.
✅ Variety of Styles – Mimic marble, subway tiles, or wood.
Potential Downsides
❌ May Need Extra Adhesive – Some tiles don’t stick well to textured surfaces.
❌ Heat Sensitivity – High heat can weaken the adhesive.
Want the best results? Follow this guide for a strong, lasting installation!
Steps for Installing Peel and Stick Tiles in Your RV
Preparation is essential for a successful installation. To ensure the tiles adhere properly and stay in place over time, follow these key steps:
Step 1: Prepare the Surface
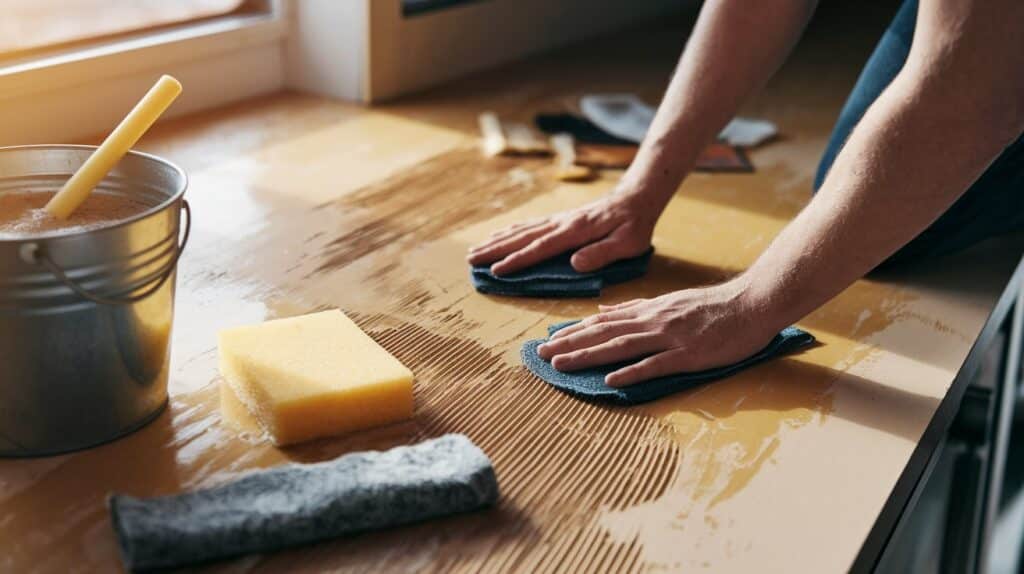
1. Clean the Wall or Surface
Dirt, grease, and moisture weaken adhesion. Clean the surface well before installing tiles.
Best Cleaning Method:
- Use TSP (Trisodium Phosphate) or a degreaser to remove oil and dirt.
- Wipe with a damp cloth and let it dry completely.
🚫 Avoid oil-based cleaners—they leave a residue that can prevent tiles from sticking.
2. Lightly Sand the Surface (If Needed)
If the surface is smooth or glossy, lightly sand it to help the tiles stick better.
- Use 220-grit sandpaper to roughen the surface.
- Wipe away dust with a damp cloth.
3. Fill Any Gaps or Cracks
Uneven surfaces can cause tiles to lift. Fix any holes or cracks before installation.
- Apply spackle or filler to smooth out the surface.
- Let it dry, then sand it smooth.
Step 2: Choose the Right Peel and Stick Tiles
Not all peel and stick tiles work well in an RV. Pick the right type for better durability.
✅ Best Material: Vinyl tiles – Flexible and lightweight.
✅ For Kitchens & Bathrooms: Water-resistant tiles.
✅ Strong Adhesive: Look for brands like Smart Tiles, Art3d, or Tic Tac Tiles.
✅ Heat Resistance: Choose heatproof tiles for areas near the stove.
Step 3: Do You Need Extra Adhesive?
Most peel and stick tiles come with adhesive, but RV walls are tricky. Extra glue may help in some areas.
Use Extra Adhesive If:
✔ The wall is textured, uneven, or glossy.
✔ You’re installing tiles in a humid area (bathroom/kitchen).
✔ The tiles don’t seem to stick well.
Best Extra Adhesives:
🟢 Gorilla Glue or E6000 – Strong and long-lasting.
🟢 3M 90 Spray Adhesive – Works well but makes removal hard.
🟢 Liquid Nails – Best for permanent installations.
🚨 Don’t overuse glue! Too much can make repositioning difficult.
Step 4: Install the Peel and Stick Tiles
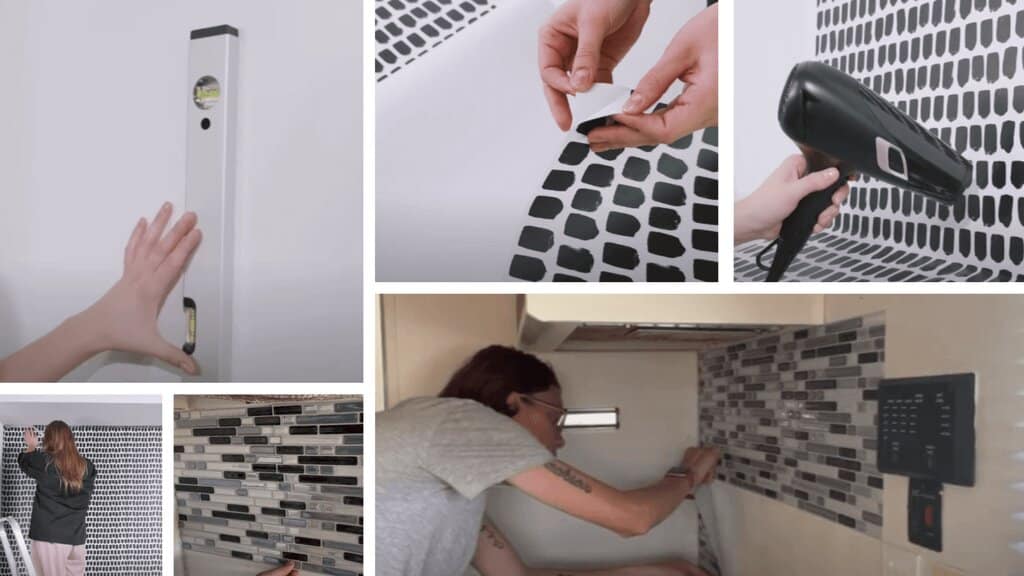
1. Find the Center of the Wall
- Measure and mark the center point.
- Use a level to keep tiles straight.
2. Place the First Tile
- Peel off the backing.
- Align the tile with your center mark.
- Press firmly onto the surface.
3. Work Outward
- Add tiles one by one, keeping edges aligned.
- Trim edges and corners with a utility knife.
4. Press Firmly to Secure
- Use a roller or cloth to press each tile down.
- If using extra adhesive, hold tiles in place for 30 seconds.
5. Seal the Edges (Optional)
For bathrooms or kitchen backsplashes, seal edges with clear silicone caulk to prevent water damage.
Step 5: Keep Your Tiles Looking Great
To keep your tiles in top shape, follow these tips:
✅ Clean gently – Use a damp cloth with mild soap.
✅ Check for loose edges – Press down if any corners lift.
✅ Want to remove them? Use a hairdryer to soften the adhesive.
Avoid These Common Mistakes
🚫 Skipping surface prep – Leads to peeling tiles.
🚫 Not letting surfaces dry after cleaning – Moisture weakens adhesion.
🚫 Installing too fast – Take your time to measure and align tiles properly.
🚫 Overlapping tiles – Can cause lifting over time.
Final Thoughts
Installing peel and stick tiles in your RV is a simple but rewarding DIY upgrade. If done right, you’ll get a stylish and durable finish that lasts through all your RV adventures.
Quick Recap:
✔ Prep the surface well – Clean, sand, and smooth it out.
✔ Choose the right tiles – Vinyl and water-resistant options work best.
✔ Use extra adhesive if needed – Helps in humid or textured areas.
✔ Take your time installing – Align tiles carefully for a pro look.
✔ Maintain them well – Clean gently and check for loose edges.
Have you tried peel and stick tiles in your RV? Share your tips in the comments! 🚐✨