How to Hook Up an RV Battery: Safe and Easy Installation
Ever wondered how to hook up an RV battery without any hiccups? Whether you’re setting off on your first trip or re-installing after the off-season, hooking up an RV battery can feel a little daunting—but it doesn’t have to be!
As an RV enthusiast who’s learned through trial and error, I’m here to guide you through the process. With this step-by-step guide, you’ll have your battery safely connected and your RV ready to roll in no time. We’ll cover everything you need to know—from tools to common mistakes—so you can tackle this task with confidence. Let’s get started!
1. Why Knowing How to Hook Up an RV Battery Matters
Properly connecting your RV battery is essential to:
- Powering Your RV Systems: Appliances, lighting, and critical systems rely on a well-connected battery.
- Preventing Electrical Damage: Incorrect connections can lead to short circuits or damage to your RV’s electronics.
- Ensuring Safety: Missteps can result in sparks, shocks, or even fires.
Caution: Always follow safety protocols when handling batteries. Improper connections can cause severe damage and even pose a fire hazard. Use insulated tools and protective gear to mitigate risks.
For more information on the risks of improper battery handling, check out RV Battery Safety Guide.
2. Tools and Preparations
Before you start, gather these tools and follow these safety steps:
Tools Required:
- Wrenches or socket set
- Insulated gloves
- Safety glasses
- Battery terminal cleaner
- Voltage tester or multimeter
Safety Checklist:
- Turn off all power sources to the RV.
- Ensure the battery is the correct type for your RV.
- Work in a well-ventilated area.
RV Battery Voltage Table:
| Battery State | Voltage (Lead-Acid) | Voltage (Lithium) |
|---|---|---|
| Fully Charged | 12.6V – 12.8V | 13.3V – 13.4V |
| Half Charged | 12.2V | 12.8V |
| Discharged | 11.9V or below | 12.0V or below |
For additional insights on battery voltage levels, visit Battery University.
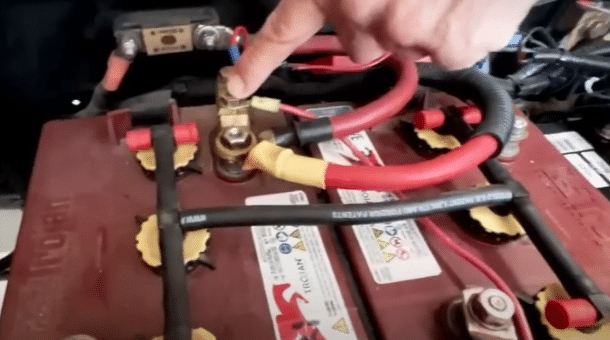
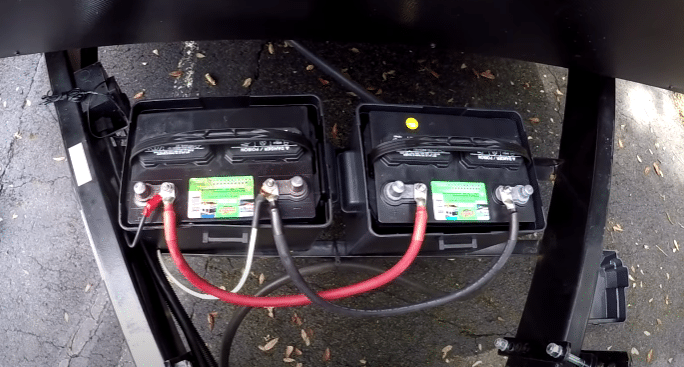
3. Understanding RV Battery Components
Most RV batteries have two key components:

- Positive Terminal (+): Usually marked in red.
- Negative Terminal (-): Usually marked in black.
Ensure you can identify these before connecting the battery to avoid reversing the connections, which could cause severe damage.
4. Step-by-Step Guide to Hooking Up Your RV Battery
Step 1: Disconnect All Power Sources
- Unplug your RV from shore power and turn off the generator.
Step 2: Identify Terminals
- Locate the positive and negative terminals on the battery and the corresponding cables in the RV.
Step 3: Connect the Positive Terminal (+)
- Attach the positive cable to the positive terminal of the battery. Use a wrench to secure it snugly but not overly tight.
Step 4: Connect the Negative Terminal (-)
- Attach the negative cable to the negative terminal, ensuring a solid connection.
Step 5: Secure Connections and Test
- Check that all connections are tight and corrosion-free.
- Use a voltage tester to confirm the battery is properly connected and supplying power.
Safety Tip: Ensure there are no exposed wires or loose connections that could cause a short circuit. Use terminal covers for added protection.
5. Common Mistakes to Avoid
- Reversing Terminal Connections: Double-check before attaching cables.
- Skipping Safety Gear: Always wear gloves and safety glasses.
- Ignoring Loose Connections: Loose cables can lead to intermittent power or sparks.
6. Maintaining Your Battery Connections
Keep your battery in top condition by:
- Inspecting Regularly: Check for loose connections, wear, or corrosion.
- Cleaning Terminals: Use a terminal cleaner or baking soda solution to remove buildup.
- Proper Storage: Disconnect and store the battery in a cool, dry place during long periods of inactivity.
FAQs
1. Can I hook up the RV battery while appliances are on? No, always turn off all appliances and power sources before connecting the battery to avoid sparks or electrical damage.
2. What happens if I mix up the terminals? Reversing terminals can cause short circuits or permanent damage to your RV’s electrical system.
3. How often should I inspect my battery connections? Check connections every 2-3 weeks during frequent use and before each trip.
4. Do I need special tools to hook up an RV battery? No special tools are required; a wrench and safety gear should suffice.
5. How do I know if the battery is installed correctly? Test the system using a multimeter. If the battery provides the correct voltage and all systems work, it’s installed properly.