How to Empty Your RV Black Tank – The #1 Mistake to Avoid!
Emptying my RV black tank was one of those tasks I used to dread, but over the years, I’ve learned how to do it efficiently and avoid the messy, smelly mistakes that can ruin a camping trip. If you’re new to RVing or just looking to refine your process, I’m here to share my experience and tips to help you master this essential task. Trust me, it’s not as bad as it seems—once you know what you’re doing!
Understanding Your RV Black Tank
What Is an RV Black Tank?
When I first started RVing, I didn’t fully understand the difference between the black tank and the gray tank. The black tank is where all the toilet waste goes, while the gray tank holds water from sinks and showers. The black tank requires a bit more care because, well, it’s dealing with sewage. Learning this early on saved me from a lot of headaches.
Why Proper Maintenance Matters
I’ll admit, I made the mistake of neglecting my black tank once, and it was a disaster. The smell was unbearable, and the sensors stopped working because of buildup. Since then, I’ve made it a priority to empty and maintain my black tank regularly. Trust me, a little effort goes a long way in keeping your RV clean and odor-free.
Essential Supplies I Always Use
Over time, I’ve learned that having the right tools makes all the difference. Here’s what I always keep on hand:
- A sturdy sewer hose: I’ve had cheap hoses leak on me, so I invested in a high-quality, leak-proof one.
- Rubber gloves: These are a must for protecting your hands from bacteria.
- Tank treatment chemicals: I use these after every dump to break down waste and control odors.
- A dedicated water hose: I have one just for flushing the tank—never for drinking water.
Check Out a free list – RV Maintenance & Repairs Essential Product List.
How I Prepare to Empty My RV Black Tank
1. Choosing the Right Dumping Station
I always make sure to use a designated dump station, whether it’s at a campground or an RV park. Early on, I learned the hard way that dumping anywhere else is not only illegal but also harmful to the environment. Plus, it’s just not worth the risk.
2. Positioning My RV Correctly
I’ve found that positioning my RV close to the sewer connection is key. If the hose is stretched too far, it can lead to leaks or spills—something I definitely want to avoid.
3. Checking for Leaks and Secure Connections
Before I start, I always inspect my sewer hose for cracks or damage. One time, I didn’t check, and let’s just say it was a messy lesson learned. Now, I double-check everything to make sure it’s secure.
My Step-by-Step Process for Emptying the Black Tank
Step 1: Putting on Protective Gear
I never skip this step. Rubber gloves are my best friend when it comes to handling the black tank.
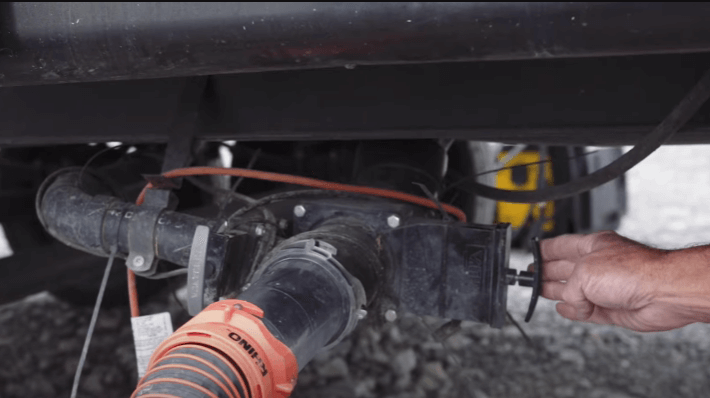
Step 2: Connecting the Sewer Hose
I attach one end of the hose to the RV’s black tank outlet and the other end to the dump station inlet. I always make sure the connections are tight to prevent leaks.
Step 3: Opening the Black Tank Valve
I open the valve slowly and let gravity do its thing. I’ve learned that rushing this step can lead to splashes or spills, so patience is key.
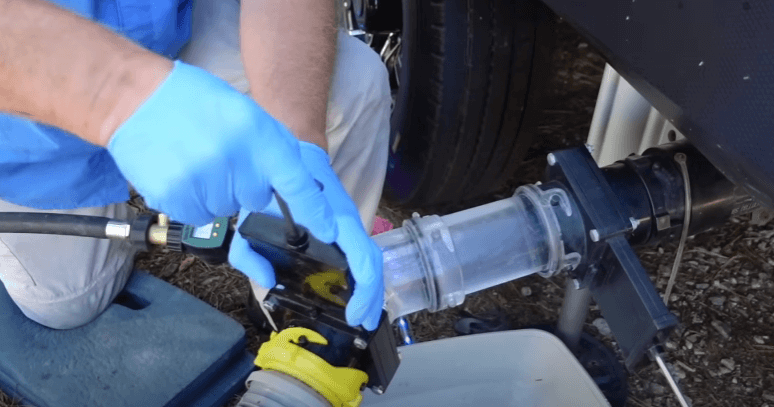
Step 4: Flushing the Black Tank
If your RV has a built-in flush system, use it. Mine doesn’t, so I use a separate hose to flush water into the tank manually. This step is crucial for keeping the tank clean.
Step 5: Closing the Valve and Disconnecting
Once the tank is empty, I close the valve securely and carefully disconnect the hose. I always check for drips to avoid any mess.
Step 6: Cleaning and Storing My Equipment
I rinse the sewer hose thoroughly before storing it. I also keep all my gear in a dedicated storage area to avoid cross-contamination.
How Often I Empty My Black Tank
I’ve found that emptying the tank every 3 to 5 days works best for me, depending on how much I’m using it. If the sensors show it’s two-thirds full, I don’t wait—I empty it right away.
Best Practices I Swear By
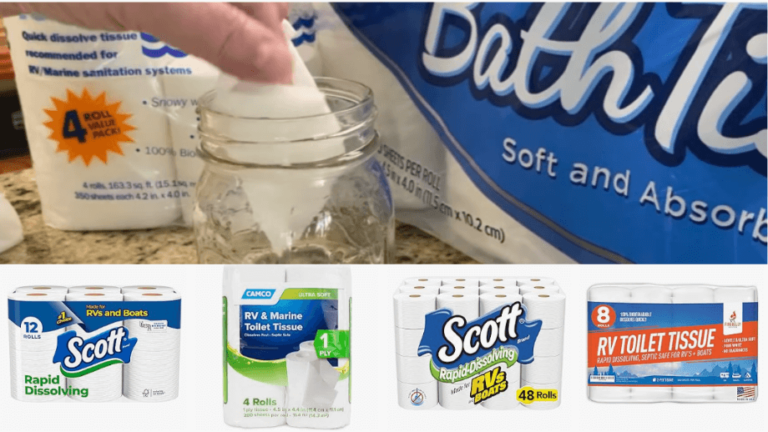
- Using RV-safe toilet paper: Regular toilet paper caused a clog once, and I’ll never make that mistake again.
- Adding tank treatment chemicals: I do this after every dump to keep things fresh.
- Flushing the tank regularly: This keeps the sensors clean and functioning properly.
Common Mistakes I’ve Made (So You Don’t Have To)
- Waiting too long to empty the tank: This led to a nasty clog that took hours to fix.
- Not using enough water: Solids hardened and caused a blockage.
- Leaving the black tank valve open: This caused waste to solidify and block the flow.
How I Troubleshoot Common Issues
1. Dealing with Clogs
When I had a clog, I used a tank cleaner and filled the tank with warm water. Letting it sit for a while before flushing did the trick.
2. Reducing Odors
I switched to enzyme-based tank treatments, and they’ve been a game-changer for controlling odors.
3. Fixing Misreading Sensors
I’ve found that regular flushing prevents debris from blocking the sensors and keeps them accurate.
Final Thoughts
Emptying your RV black tank might not be the most glamorous part of RVing, but it’s one of the most important. By following these steps and learning from my mistakes, you can keep your RV clean, odor-free, and running smoothly. Trust me, once you get the hang of it, it’s no big deal!
FAQs Based on My Experience
How do I know when my RV black tank is full?
I always check the tank sensor. If it reads two-thirds full, it’s time to empty.
Can I use regular household toilet paper in my RV?
Nope! I learned the hard way that only RV-specific toilet paper should be used to prevent clogs.
What should I do if my black tank smells bad?
I use odor-control treatments and make sure to flush the tank regularly.
Can I dump my black tank anywhere?
Absolutely not. I always use designated dump stations to stay legal and eco-friendly.
How do I clean my RV black tank sensors?
I flush the tank thoroughly and use cleaning additives designed for sensors.